Probably about half of the meals we make around here require broth of some sort; whether it’s a skillet chicken and rice dish from my favorite cooking blog or some pronto penne pasta, broth (especially chicken broth) is an absolute staple in our kitchen.
Theoretically, I knew in the back of my head somewhere that you could make your own broth, but since the only things I’d ever read about it were from books or magazines that were written by cooking school pros, I thought it was out of my league.
Then I started reading An Everlasting Meal: Cooking with Economy and Grace, which is basically an artfully woven guide on how to cook using what you already have lying around. Imagine my surprise when I discovered that making your own broth was not only ridiculously simple, but that it was also a great way to use up those odds-and-ends vegetables that seemed to always be going bad around here.
Two of my favorite quotes from the book that made me finally try this out for myself:
“There is a prevailing theory that we need to know much more than we do in order to feed ourselves well. It isn’t true. Most of us already have water, a pot to put it in, and a way to light a fire. This gives us boiling water, in which we can do more good cooking than we know” (5).
“The bones and shells and peels of things are where a lot of their goodness resides. It’s no more or less lamb for being meat or bone; it’s no more or less pea for being pea or pod…The skins from onions, green tops from leeks, stems from herbs must all be swept directly into a pot instead of into the garbage. Along with the bones from a chicken, raw or cooked, they are what it takes to make chicken stock, which you need never buy, once you decide to keep its ingredients instead of throwing them away” (57).
I can basically credit this book for my desire to do my 100 Hours in the Kitchen project, in which I’ve been trying to bolster my confidence in my cooking by trying out or making up at least a dozen new recipes over each quarter of the year. Thanks to this book, I’m no longer afraid of venturing out into unknown territory, with just my fridge full of odd ingredients and an idea in my brain about how to cook them together.
But onto broth.
Here’s how easy it is:
1. First, you need to gather your ingredients.
Now, this can be an intentional process of deciding exactly which flavors you want to go in your broth (like a traditional chicken/celery/onion/carrot/garlic combination) or just a hodge podge of odds and ends that you don’t know what to do with or that are about to go bad if they’re not used.
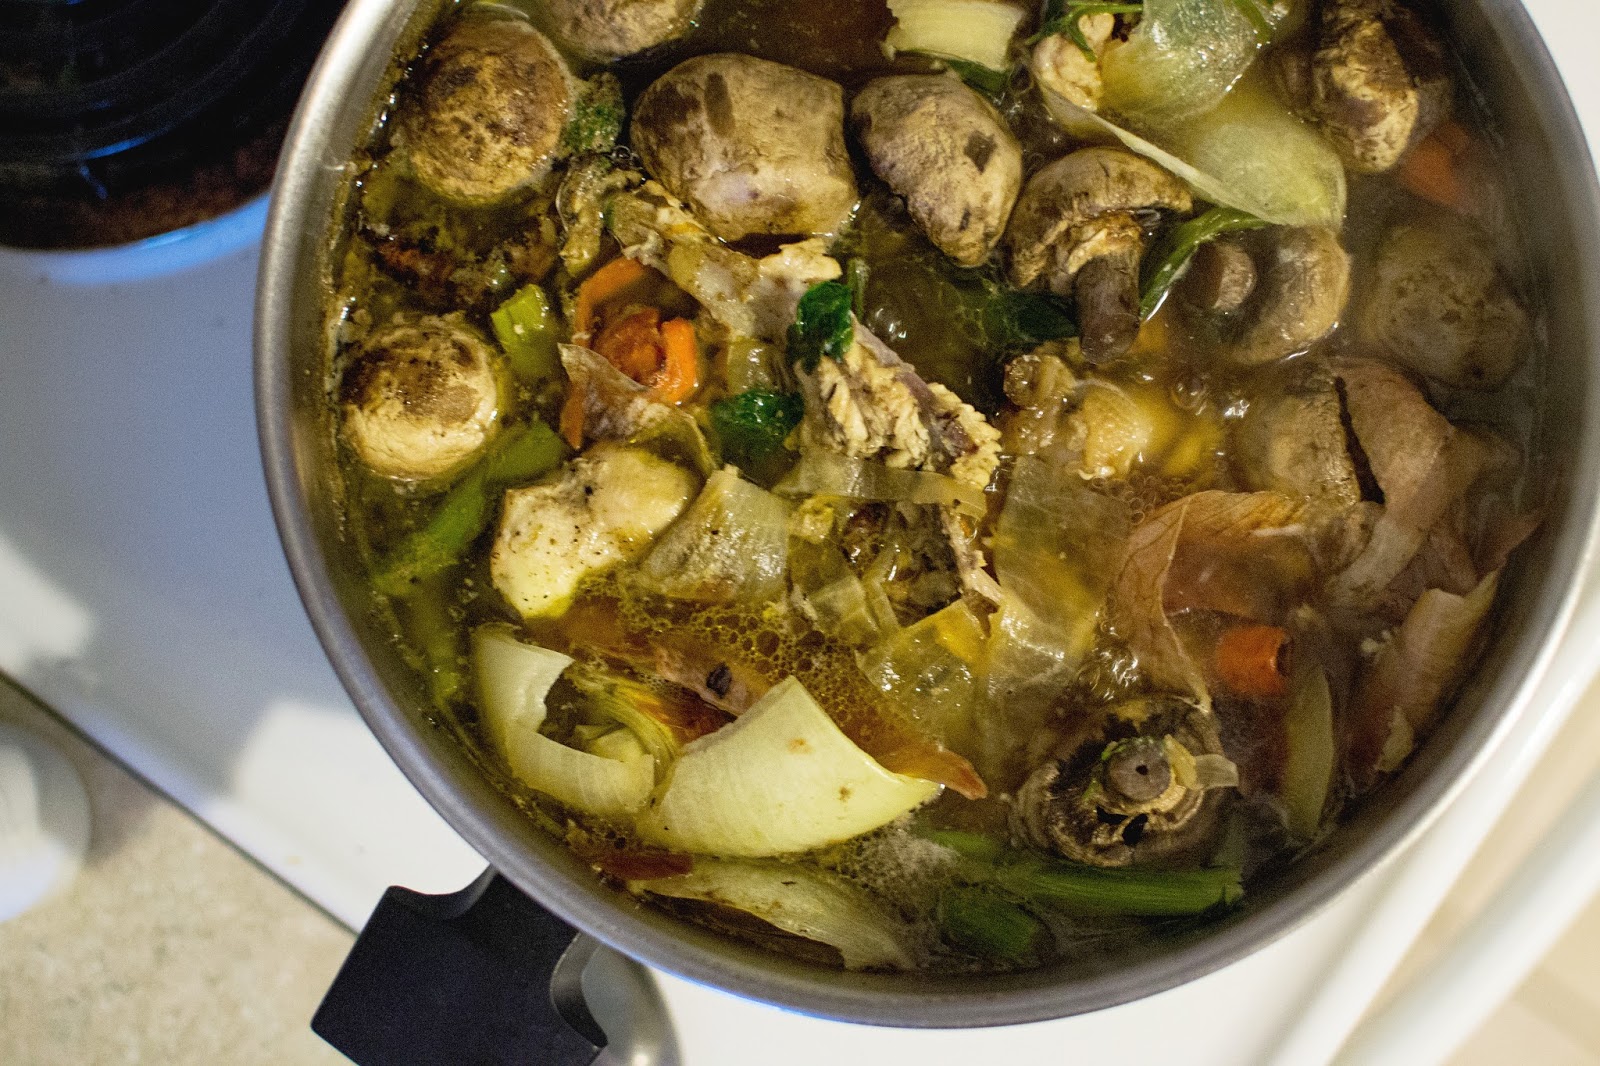
Personally, I’ve been keeping a gallon-size Ziploc bag in the door of our freezer where I’ve been squirreling away any random bits of vegetables left over from other meals–onion tops and outer layers, shriveled garlic, broccoli that’s on the verge of turning yellow, carrot ends, stray mushrooms, etc.–until the bag is nice and full.
Then, when I either buy a rotisserie chicken or roast a whole chicken or have some chicken bones left over for whatever reason, it is time to make the broth. (With the rotisserie or the homemade roasted chicken, I just pick off whatever meat I can and put the rest of the carcass–along with whatever meat is still clinging desperately to the bones–into the water).
General rule of thumb: if you want chicken broth, you need to have some sort of chicken in there (preferably with chicken bones); same goes for fish or beef broth. However, you don’t need to have any meat at all; if you just want a vegetable broth, you can make your broth based on the random ingredients you’ve stowed away. All broths will benefit from having some onion and garlic in there for sure, so you might want to add some of those in if you hadn’t stashed any away before this.
2. Put all your ingredients in a large pot (starting with the meat carcass/bones) and add enough water so that everything is covered (or floating).
Note: You basically want an inch or two of water above the general mass of stuff you’ve got in there. Some broth recipes will say that you should measure it out, but as long as you’re not adding in a ton of water over the top of your stuff or adding in too little (so that everything is still poking out of the water), it’s really hard to mess this up, so there’s no need to measure.
3. Salt, salt, salt!
I usually start out liberally salting all visible vegetables and then stirring everything together. When the water starts to break out into lazy bubbles, I taste the water to see if it needs more (it almost always does). Keep tasting your broth and salting as necessary throughout the cooking process until you get something that tastes good all by itself.
Good news–if you accidentally over-salt your broth, all is not lost–just add a little more water and taste again. Seriously, it’s really, really hard to mess this up.
4. Turn your stove up to high and keep half an eye on your broth so that you can see/hear when it starts to boil. Once it reaches close to rapid boiling point (big, popping bubbles), turn it way down.
Ideally, you don’t want a vigorous boil here—more like a lazy bubble here and there or just under a simmer. If you want to just put your broth on the stove and forget about it, you could even turn your stove to a medium heat, which would just take longer to heat up and not hit a rapid boiling point. Because I’m a bit impatient sometimes, I just like to put it on high and then turn it way down once it starts to break out into bubbles.
Note: for your reference, once the water starts to just barely bubble, I’ll turn my stove all the way down to low-medium to keep it just under a simmer (but every stove is different, so you’ll just have to try out different temperatures).
5. Skim any foam/fat that rises off the top as your broth continues to cook.
Broth takes awhile to make, as you want to leave ample time for all the flavors to meld together, so about an hour into your cooking time (I usually cook mine for 2-3 hours), take a spoon and skim off the layer of white foamy fat that’s accumulated at the top. You’ll have to do this a couple times, probably. (But if you leave the pot on the stove for 3 hours and forget about it, don’t worry–you can still do it at the end.)
6. After 2-3 hours of gentle simmering, take your broth off the stove and strain out all the solids.
If you really want to get fancy, you can use a fine mesh strainer to do this, but if you just have a basic colander like me, that works too. Or, if you trust yourself greatly, use the lid of the pan to keep the vegetables and bones in and pour the broth into a heat-safe container.
7. Either store your broth in the fridge to be used within about a week, or put it in your freezer, where it will keep anywhere from 6 months up to a year.
Note: store the broth in a way that makes the most sense for how you cook. If you’re planning on using your broth as the base of a soup, you can get away with storing it in large Tupperware containers or recycled cottage cheese/yogurt containers. Or, if you want to be really on top of things, you can portion out one-cup sizes of broth and freeze them in individual portions like that, or you could even freeze them in ice cube trays if you frequently use just a small amount.
And that’s it! Sure, there are ways you can get fancy about it and more complicated techniques that pro chefs use, but I’ve tried this method out several times now, and my broths have always worked fantastically (even if they were sometimes a murky brown from the added mushrooms rather than the golden color of the store-bought stuff).
Have you ever tried to make your own broth? Make sure to share any tips you have!


