
I know I’ve been promising house updates and before and after pics for several months, but now that my first flower farming season is finally starting to wind down, I’m able to focus a bit on the house again and actually follow through on that promise. The majority of our big house updates that we were planning for this first year are mostly complete (with the exception of putting new baseboards in to replace the old ones that we ripped out), and now I’m just realizing that I have really, really blank walls (ha ha). I usually get some gift money for my birthday (which is in late September), so I’m thinking I might put some of that towards buying a few home decor items to spruce up some of the areas that most need some pops of color on the walls — like the kitchen and eat-in dining area — before I share the final(ish) updates on those.
I figured I’d start us off by showing you the back family room, which is a large living area just off the kitchen and dining area. One thing that was really important to me while we were looking for this second house was that I wanted a place that had two large common areas on the main floor if possible. I loved our first house, but it was extremely difficult to entertain because of the lack of common areas and the compactness of the kitchen and living area space. In our new house, we have an extremely roomy front room (that we’ve basically divided into two “rooms” visually), as well as the large family room in the back of the house that I’ll be sharing with you today. This back living area is part of an addition that was put onto the house sometime in the 90’s, and it’s really a huge reason why we bought this property — this family room is probably our most-used space in the house!
Note: There are affiliate links to products mentioned below, which means I may get a small commission on any purchases made through these links, at no extra cost to you.

BEFORE
The people who lived here before us seemed to mostly be using the space as an office and play area for the kids, as you’ll see in these pictures taken from the listing. We knew that we wanted to invite our family to gather together with how we arranged the furniture in the room, so we put our largest sectional couch where they had their desk, and we also decided to put our t.v. back here (the former tenants had placed their t.v. in the front entry room just off to your right as you come in the house). For awhile at the beginning of our time in the house, Matt was working one day a week from home, so he needed a bit of an office space in here as well. We ended up kind of lucking into the perfect configuration for his little workspace (which we’ll show you in the after pictures) simply because we started having the movers put pieces of furniture in the general areas where we wanted them, and I happened to notice that the L-shaped couch made a little office nook in the back that was perfect for the DIY sawhorse table that Matt had made ages ago.

Also, while the carpet wasn’t in terrible shape, you’ll notice from the pictures if you look closely that it was starting to wrinkle and pull at the edges. We could have just opted to have it re-stretched, but because we knew we’d be changing the kitchen tile next to it for sure (because I absolutely despised it), we decided to just make the flooring consistent throughout this space and the adjacent kitchen and dining areas.
Lastly, this room — like the rest of the main floor — was painted a dark beige that clashed a bit tonally with some of the other colors around the house (as well as made it feel darker), so we ended up painting almost the entire main floor in Agreeable Gray.
AFTER
And here’s how the room looks today!

You’ll notice that the furniture layout drastically alters the feel of the room and definitely makes it seem cozier and more inviting for family gathering. We still do have the standing gas fireplace (which we intend to use and put back in its original place), but we’re trying to figure out which material to put underneath it to make it a bit safer (since it was just sitting straight on the carpet before, and we don’t want it to sit directly on our LVP floor either).
Ideally someday we’ll update the light fixture — I still want a fan, but I’d like something a bit more modern, such as this one — but we have higher priorities than that at the moment.

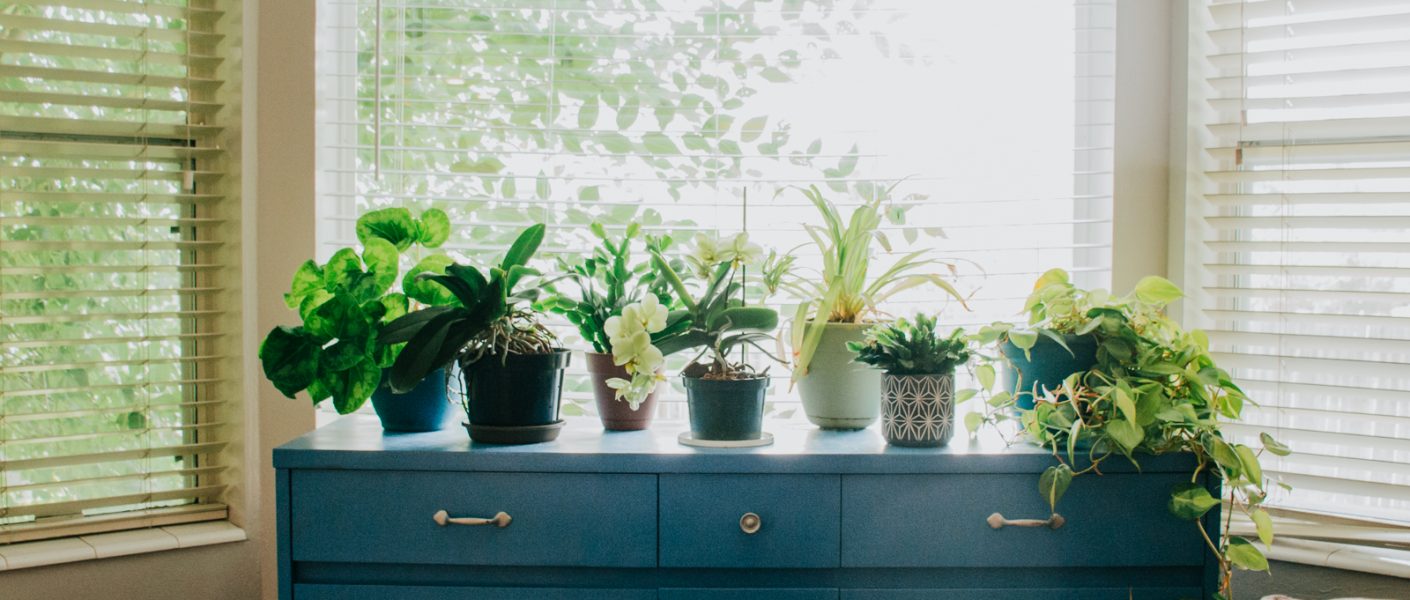
While the flooring and paint changes really helped to update the feel of the room, so did the huge 9′ x 12′ area rug that we got from Overstock on a killer sale. I wanted to pick out something with blue and green to bring out the blue and green accents already in the room — such as the dresser, painting, and all the plants — and while I was nervous about going for such a bold-seeming rug, I actually ended up really loving it in this space. My only pet peeve is that the “medallion” shape in the middle of the rug doesn’t align with the light fixture above, which I’m sure none of you noticed until I pointed it out :).

Here you’ll notice the little office nook we created for Matt. An L-shaped sectional was going to be tricky in here because of the bay window configuration, but I actually like having the couch pulled away from the far wall in order to make a little bit of space for a small desk-and-laptop setup. When the laptop is closed, you don’t even notice the little desk back there, and I feel like having the couch further from the window makes the furniture “fit” the room better, as well as defines the sitting area more prominently.
COST BREAKDOWN
If you’ve been around here for any length of time, you’ll know that I love me some budget makeovers (see: $100 Bathroom Makeover for starters) and that I will try to keep costs as low as I can. However, I also believe that for some things, it’s worth paying a little more upfront to get a better quality product that will last a lot longer and stand up to wear and tear better. While we could have gone for a cheaper LVP product (or a cheaper laminate), we ended up going with a mid-range option (Walton Oak Lifeproof, through Home Depot) that had excellent ratings and that was 100% waterproof (because we knew that with young kids underfoot, it would take a beating). So far, the flooring has been excellent and held up extremely well — it’s easy to clean, looks like real hardwood, and really warms up the space. I definitely am 100% pleased with our flooring choice.
I’ve also loved the Agreeable Gray paint color throughout most of the main floor — it is such a perfect neutral backdrop and complements both warm and cool tones equally well. It has also definitely made me realize that I need to introduce much more color and interest via other things in the room (such as furniture, artwork, etc.), but neutrals are my jam, so I’ve been 100% pleased with the paint color as well.
All in all, I’m super proud of how our space has turned out thus far!
Because we needed so much flooring to replace it in the back family room, dining area, kitchen, AND playroom, we opted to buy a pallet of it, which reduced our cost significantly. It saved us something like 35 cents a square foot to go for the pallet rather than buy it by the case. Verdict is still out whether or not the extra we have will cover an additional space (like our master closet or the main bathroom), but if it does, that will just be the icing on the cake at this point.
- Total Cost of the Flooring for the Whole Main Floor = $2,726 (with sales tax)
- Approximate Cost of the Flooring for Just This Area = $890
The Agreeable Gray color is technically by Sherwin Williams, but we opted to go for the Behr Ultra brand at Home Depot to save us some money, and they always do such a good job paint matching every time I’ve asked them to. Once again, it saved us money to buy in bulk, so we went with two 5-gallon buckets of the Agreeable Gray for the main floor.
- Total Cost of 10 gallons of paint for Majority of Main Floor = approx. $334 (with sales tax)
- Approximate Paint Cost for Just This Area = $100
We used furniture, accessories, and artwork that we already owned for the lion’s share of the decor, but we did splurge on this large 9 x 12 area rug to pull everything together, which makes a huge difference in how the space looks. We waited for a good sale and also went through my Rakuten link to get cash back.
- Cost of New Rug (which can be found HERE): approx. $318
Now, I haven’t mentioned it yet but in case you hadn’t caught on, we did all the labor ourselves to also save on costs. (And let’s be honest—Matt did the vast majority of the labor, although much of the painting was also completed by me and willing family members and friends.) I’m sure if we had hired out the flooring and painting, our costs would probably have tripled (if not more), but as it is, here is our final total:
GRAND TOTAL OF MAKEOVER THUS FAR: $1,308
***Please note that we still have to buy, paint, and install new baseboards throughout this space, which I anticipate will cost an additional $170 or so (including paint), as well as figure out what kind of material we can place underneath the standing gas fireplace, which will probably cost another $20 or so.
FINAL ANTICIPATED COST OF MAKEOVER: $1,498

And there you have it! The total cost breakdown thus far, plus all the fun before/after pics I’ve been promising for so long. Now, if you have any suggestions on what material we can safely put underneath our standing gas fireplace that won’t look totally awkward, I’m all ears!!