
Something that has become more and more clear to me over the past year or so is that I really want to become better at home renovation and design. In the past, I’ve always relied on my mom or my husband to carry out the actual work to bring most of my visions to life, but as I’ve found some interior design blogs and Instagram accounts and Youtube channels that I really love, I’ve been inspired to stop playing the “I don’t know anything about DIY” card and just jump in already.
Of course, it helps that we’re planning on closing on our new house in the next few weeks, so you’d better believe I’m in full-on dreaming and planning mode!
I often say I’m a recovering perfectionist, and my natural perfectionist tendencies really tend to rear their heads around home projects, for some reason—probably because I’m afraid that if I mess up, the mistake will be especially costly and/or time intensive to fix later. While that may be true on some projects (like the huge project we’re planning on doing of painting the kitchen cabinets…gulp!), I feel like I grossly overthink and worry about the process way more than I need to.
Also, since we *do* have some more costly home projects in our semi-near future, I wanted to get some small victories under my belt so that I wouldn’t be so afraid of messing up that I just didn’t contribute at all, thus continuing this mental narrative I have going on that “I’m just not good at DIY stuff.”
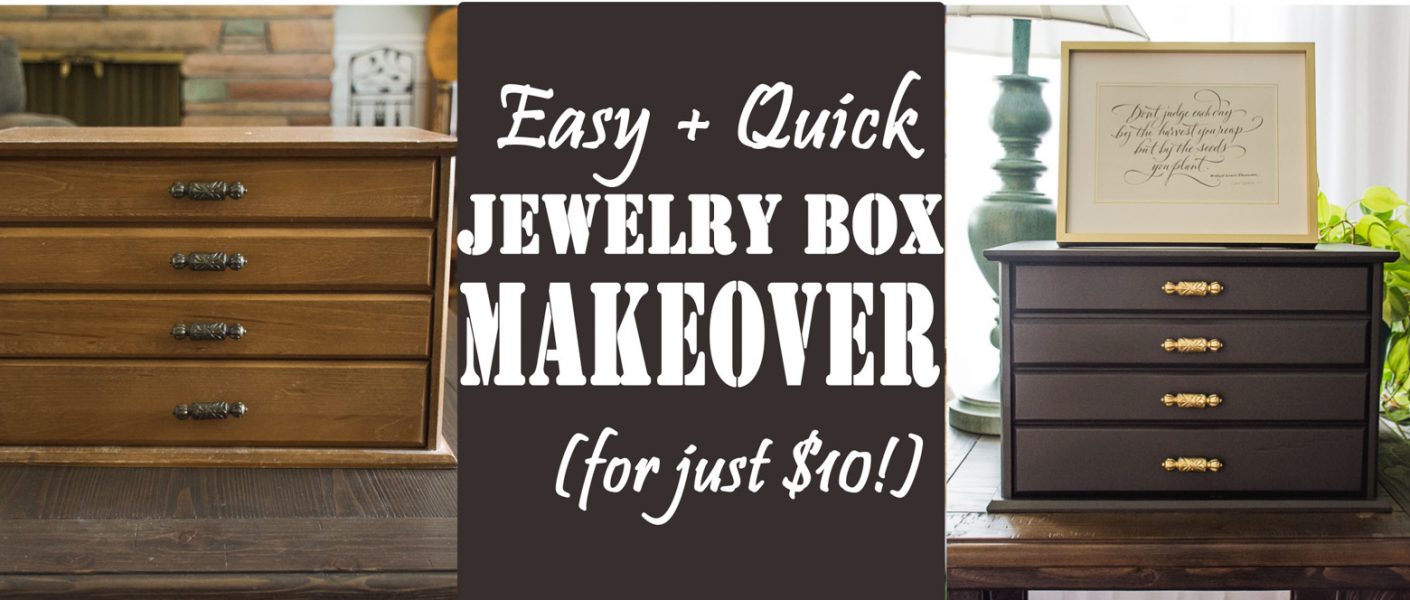
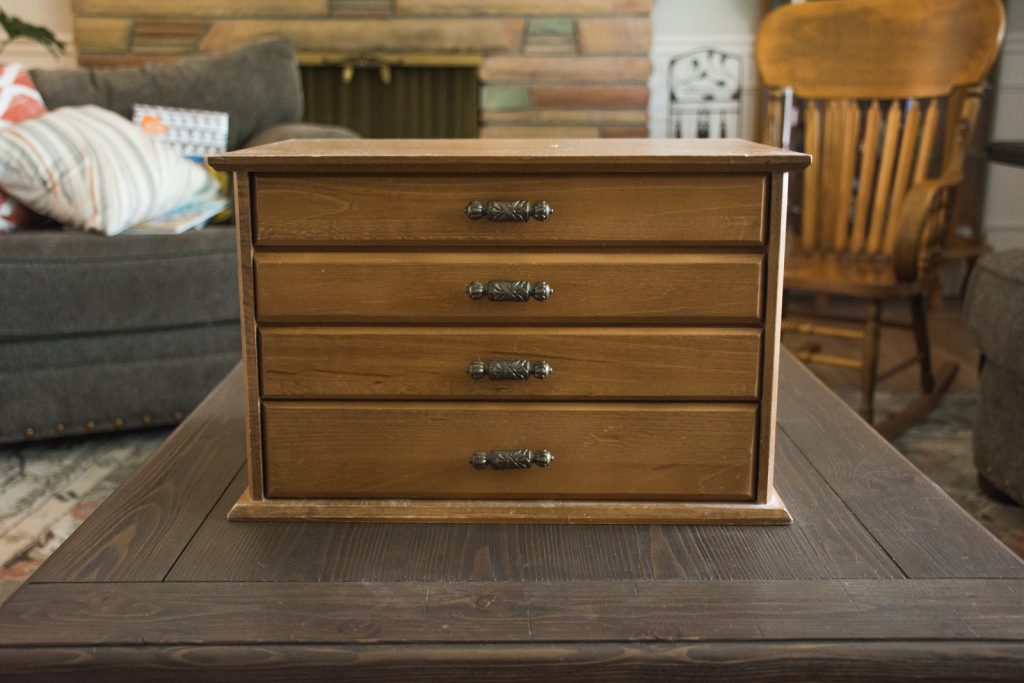
I wanted to start with a fairly foolproof first project, which is why I chose my jewelry box. I bought it many years ago for $30 at an antiques shop, but other than being the perfect place to corral all of my jewelry, it wasn’t a particularly inspiring piece in and of itself.
After doing a bit of research, I settled on trying out a matte black chalkboard spray paint for the main body and then refinishing the hardware in a gold metallic color. (I was planning on going for more of a brass color originally, but the gold was the closest thing my local store had to what I was looking for, so I just went for it.)
Here’s my step-by-step process for the makeover, all of which took less than an hour.
(Seriously, when I saw how little time it actually took and how basically foolproof this particular kind of spray paint was, I was a bit embarrassed that I’ve waited so long to just do it myself already.)
Note: There are affiliate links below to products mentioned, which means I may get a small commission on any purchases made through those links at no extra cost to you.
Quick + Easy Jewelry Box Makeover
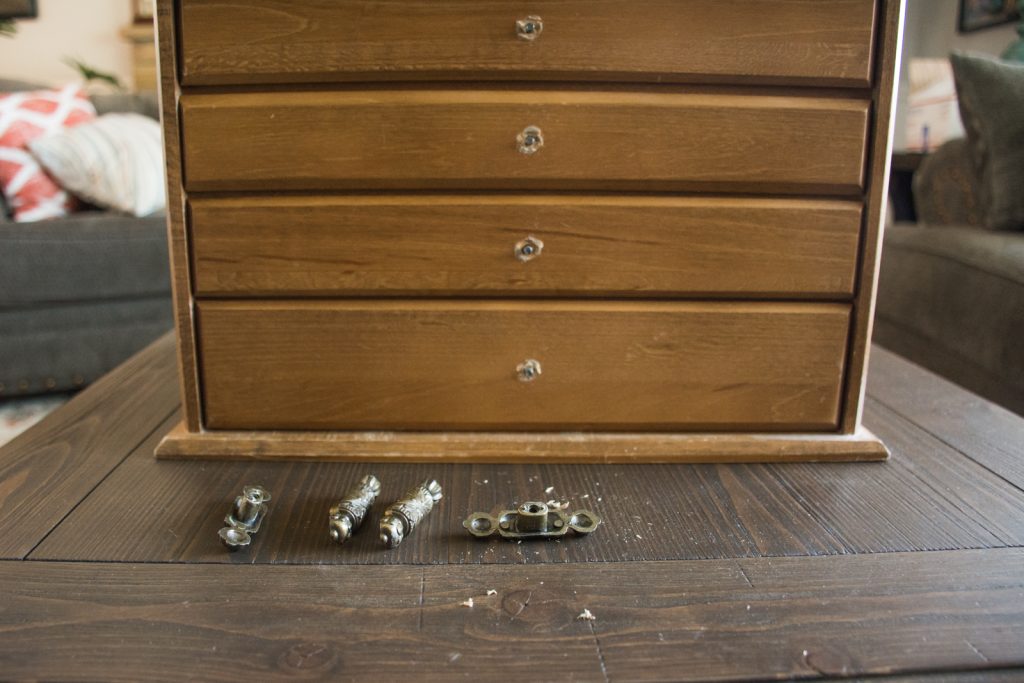
Step One: Remove the hardware.
The hardware on my jewelry box had clearly never been removed once being put on, as it was screwed on so tightly that once I started unscrewing, it did some serious damage to the wood once I started taking off each piece. I figured that since I was going for such a matte dark color that the worst of it would be covered, and since the hardware was going right back on, you hopefully wouldn’t be able to see the new gouges in it.
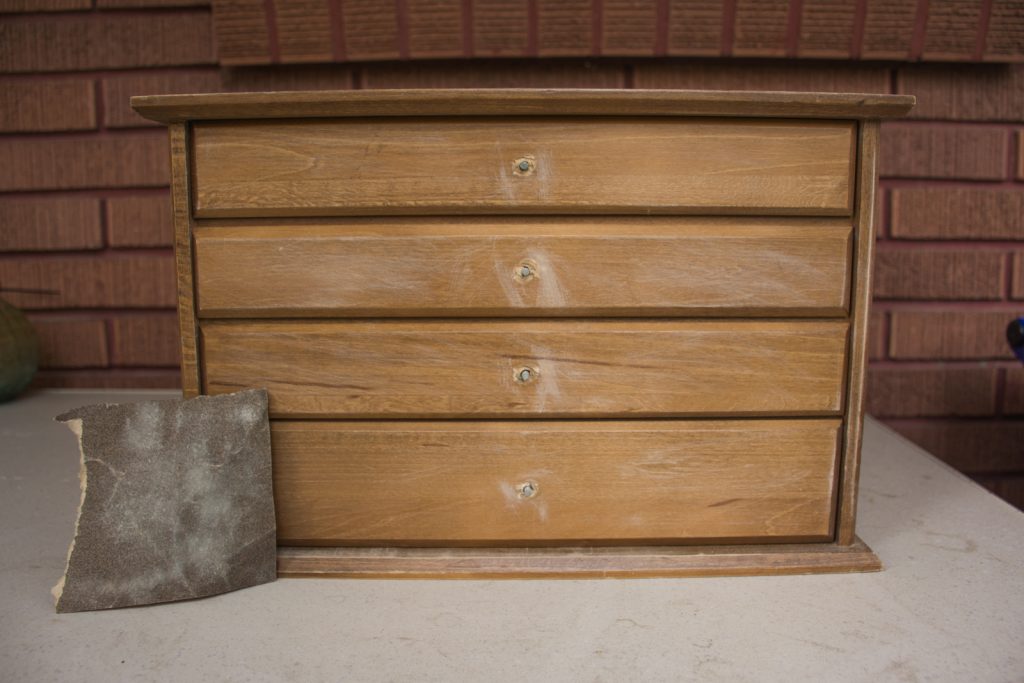
Step Two: Lightly sand the surface.
I used a 100-grit sandpaper to lightly sand the surface, but I probably should have used a finer sandpaper—I definitely scratched up the front a bit where I was trying to sand down where the hardware had been removed. There was also a bit of a ding on the top which smoothed down okay, but which is still a big enough nick to show up if you’re looking for it.
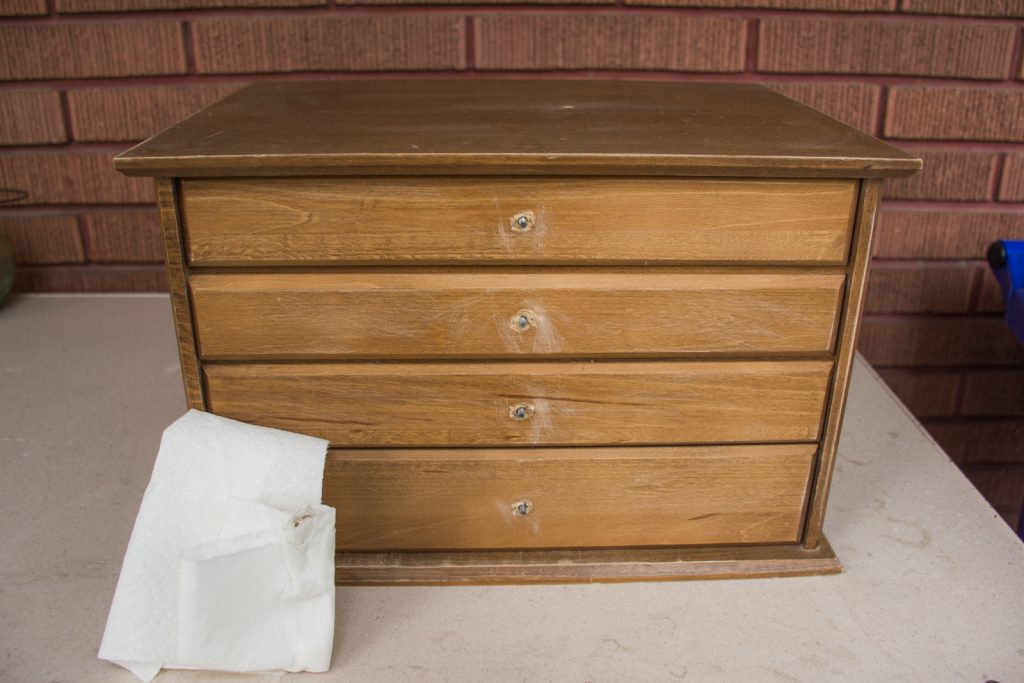
Step Three: Wipe down the surfaces with a damp paper towel and then wipe them off with a dry paper towel.
Nothing much to report here, other than that I didn’t need to use the dry paper towel much as the wood dried pretty much immediately after I’d gone over the whole thing with the damp one.

Step Four: Shake the spray paint can for the minimum recommended time (usually 1-2 minutes) and hold the nozzle 10-12 inches away and give a continuous coat over the entire box.
The only other time I’ve attempted to spray paint anything, I had chosen one with a much brighter and more luminous finish, which is definitely harder to pull off because I had to pay attention to how even the coats were. In this case, the paint was so matte that I really didn’t have to worry about being that even with my spraying at all (though I still tried to be). I made sure to go at the jewelry box from different angles so as to make sure everything got coated, including the parts that you wouldn’t see unless you happened to be just below eye level.
I had put down newspapers to minimize mess, which worked out really well except that it was slightly breezy here today, which meant that I had to sit outside for about 20 minutes and make sure the newspaper didn’t blow up and stick to the newly-sprayed surfaces.
Note: I used this spray paint from Rust-Oleum’s “Chalked” line for this project, which cost me $6.48 on Amazon when I bought it a few months ago. It looks like the price has recently doubled, so maybe shop around or wait and see if the price will go down again.
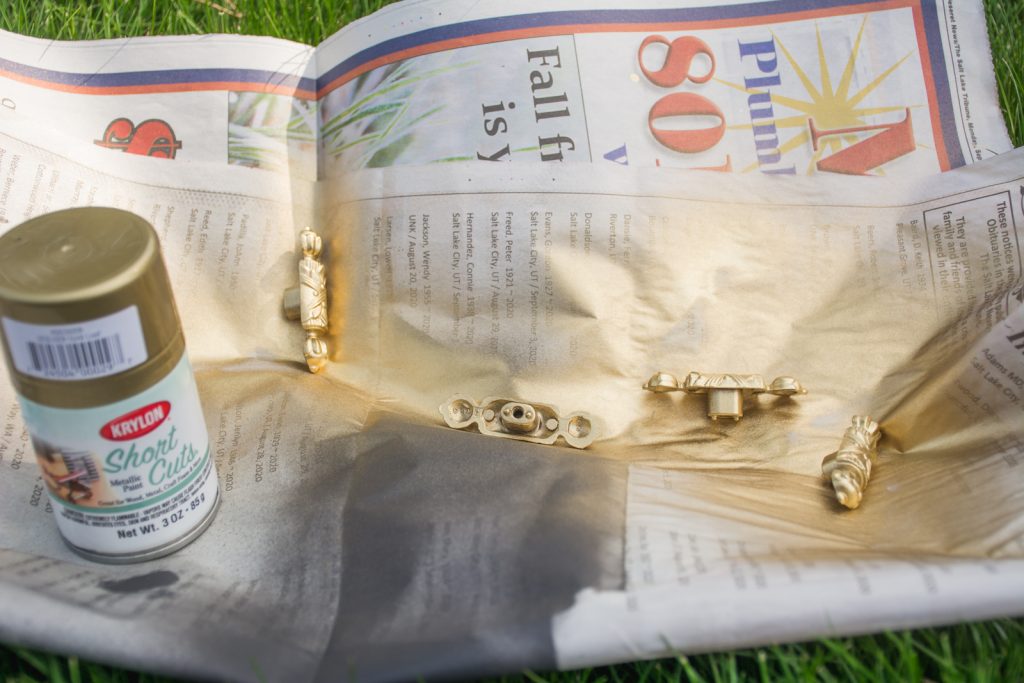
Step Five: Spray the hardware in a similar fashion, turning over once to get the underside after about 2-3 minutes
I had a terrible time of it the last time I attempted to spray paint hardware, so I was pleasantly surprised to see how much smoother it went this time around. Part of it is because this kind of spray paint didn’t adhere to the newspaper or gunk up like crazy like the other kind seemed to, and the other part was because I was more conscious of the placement of the hardware pieces before I started, which meant I only *barely* had to move them to get the other side.
Note: I used this mini bottle of Gold Leaf spray paint from Krylon (the size was perfect since I hardly needed any), which cost me $2.99 at my local store. Once again, I’ve linked to the Amazon product, but it also is running twice as much as before as well (over $6). Definitely try shopping around!
Step Six: Let dry for the minimum recommended time and reattach the hardware.
I was a bit too eager in wanting to reattach the hardware, which meant I had to do some slight touch-up work, which I accomplished by spray painting the corner of a dry paper towel with the black spray paint and just gently dabbing it over the smudged areas.
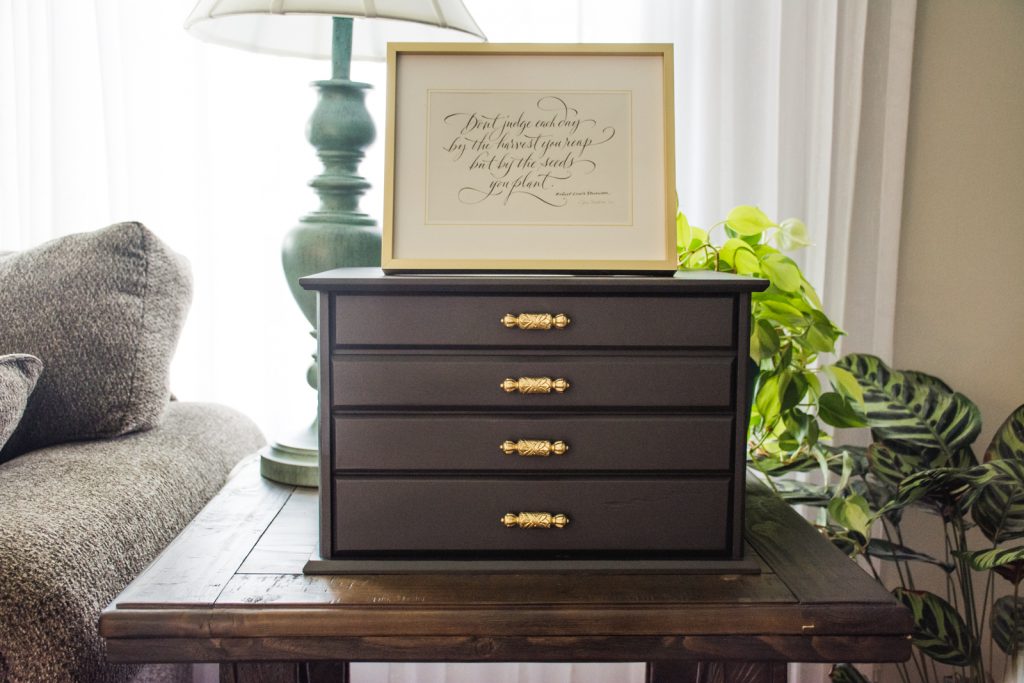
Step Seven: Admire your handiwork!
Not gonna lie, I totally love it! And it definitely gave me a bit of a confidence boost, which I’ll definitely need with all the big house projects we have planned over the next couple months 🙂
Now here’s a question for you—what’s a go-to failproof DIY project that YOU recommend I try? (Please, no sewing—I’m not quite at that level yet, lol!)


