Over the years, I’ve perfected a decent number of dishes (or at least gotten to the point where I could serve most anything to company without embarrassing myself too much).
Except for pizza.
First, there was the time that we tried grilling pizza, just because we’d heard it was so amazing. (Yeah, that was the time when we ate pizza with char marks on the bottom and some underdone, soggy toppings rounding it out.)
Then there was the time where, inspired by friends and neighbors who swore by their cooking stones, we attempted to transfer a whole pizza over to the stone from our cutting board, and…it basically fell all over the oven.
I’ve had pizza crusts with too much flour and pizza crusts that were far too doughy and huge. I’ve had sauces that have been so bland I could have been eating tomato sauce straight from the can and chicken that’s been so dry on top from being overcooked that it caught in your throat as you tried to eat it.
I’ve also made plenty of pizzas that would qualify as “decent,” but nothing that would qualify as “amazing.”
For awhile, I gave up on homemade pizza, convinced that it just might not be in the stars for me.
But then, in a frenzy of motivation and new-year-ness, I made the goal to “perfect my homemade pizza” once and for all, and I even put it on my revised 101 in 1001 list to make it official.
Ever since then, we’ve dubbed Fridays as Pizza Nights, and we have been carefully experimenting and fiddling and perfecting our techniques.
And while we can *always* improve just a bit more, I’ll say this—
Homemade pizza is now one of my strengths 🙂
And, lucky for you, I’ve never been one to hoard my secrets when they can benefit others, so I’m sharing all my hard-won wisdom today!
Note: There are affiliate links below, which means I get a small commission on any purchases made, at no extra cost to you. As always, I try to only promote products I use and love or that I would honestly consider buying for myself.
Products Worth Investing In

- First off, as much as I hated the pizza stone after a few disastrous attempts, I have since come to embrace and love it. We use a mid-priced one we got for our wedding (this Bialetti 3-pc. set that’s $33.98 on Amazon), and we’ve liked it so far, though some of the reviews said that theirs has broken after a few uses (although we’ve never had that problem, obviously). There are some that are slightly more expensive that are more highly rated (our set sits at 3.3 stars on Amazon), so eventually we might upgrade a bit and go for something like this one, which is more heavy-duty and is rectangular in shape, which would mean we could branch out a bit in our pizza shape. (The same company also makes a round one for only $38.95, and as both their rectangular one and circular one are super highly rated, I’d probably say to go for that one over the one we got for our wedding, as it’s just $5 more with no complaints about breakage.)

- Many of my failures before were due to ineffective transfers onto the pizza stone, so once we bought this Pizza Royale large wooden pizza paddle, half the battle was won (seriously, though).

- Another biggie for us has been to have plenty of sheets of parchment paper on hand (more on that in the “tips” section). We prefer the 12 x 16 precut ones (like this). Note: Of course, as I’m looking at the temperature ranges listed on most of the ones on Amazon, they say that they’re only good up to 450 degrees Fahrenheit. We’ve been using ours at 500 degrees, so…take that as you will.
Tips + Techniques
- The longer you preheat your stone for, the better. We try to preheat ours at 500 degrees for around an hour before we put our pizzas in, which is about perfect.
- The amount of dough per pizza MATTERS. Before, I was pretty lazy with noting how big the pizzas were actually supposed to be based on the dough recipes I was using, and I just made them into whichever shape I felt best. This resulted in a LOT of too-thick, doughy crusts. The dough recipe we use has been tried-and-tested weekly for months, and it’s the perfect amount for making two round 13″ pizzas (to fit our stone). For us, slightly thinner crusts yield a better crust-to-sauce-to-toppings ratio, as well as a more pleasing texture. If you like thicker crusts though, by all means experiment! It just might mean you have to pre-bake your crust for 7-10 minutes before putting toppings on.
- Assemble your entire pizza on top of a piece of parchment paper that’s on top of your pizza paddle. That way, when it’s time to slide it into the oven, you can just pull the whole piece of parchment paper carefully onto your hot stone and not have to worry about sprinkling a ton of cornmeal or anything like that to prevent sticking. (See note above on parchment paper and high temperatures.)
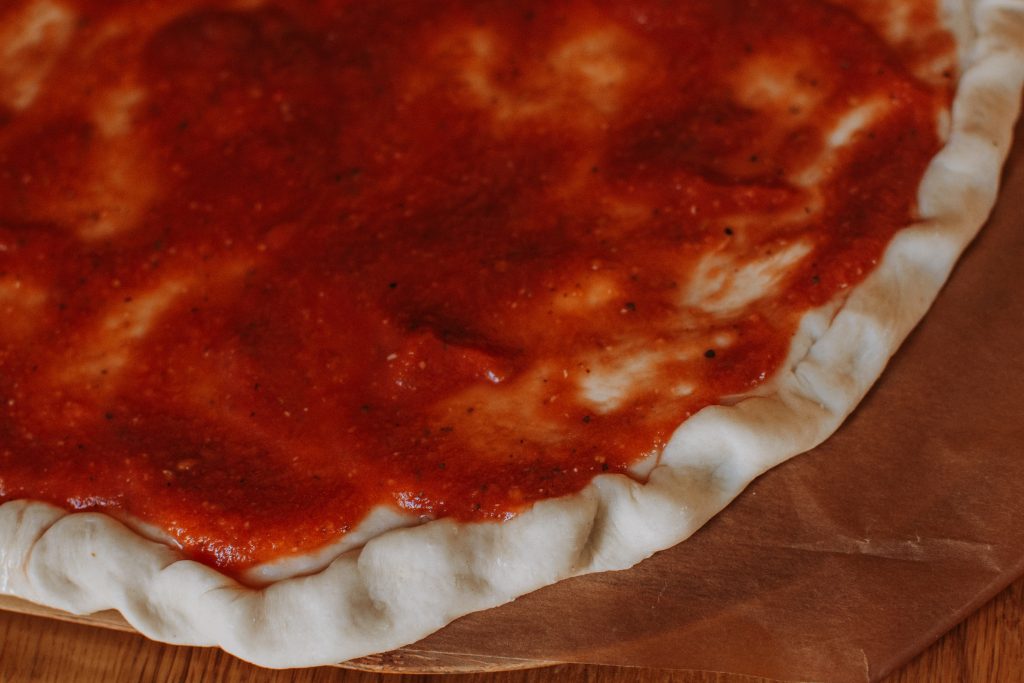
- For a cleaner edge on your crust, take the edge and slightly fold it over, pinching it down with your thumb along the diameter as you go (see pictures for illustration of what it should look like). This will create a nicer-looking finish, a more defined edge (for when you’re ready to spread your toppings), and help ensure that the ends of your pizza aren’t too thin.
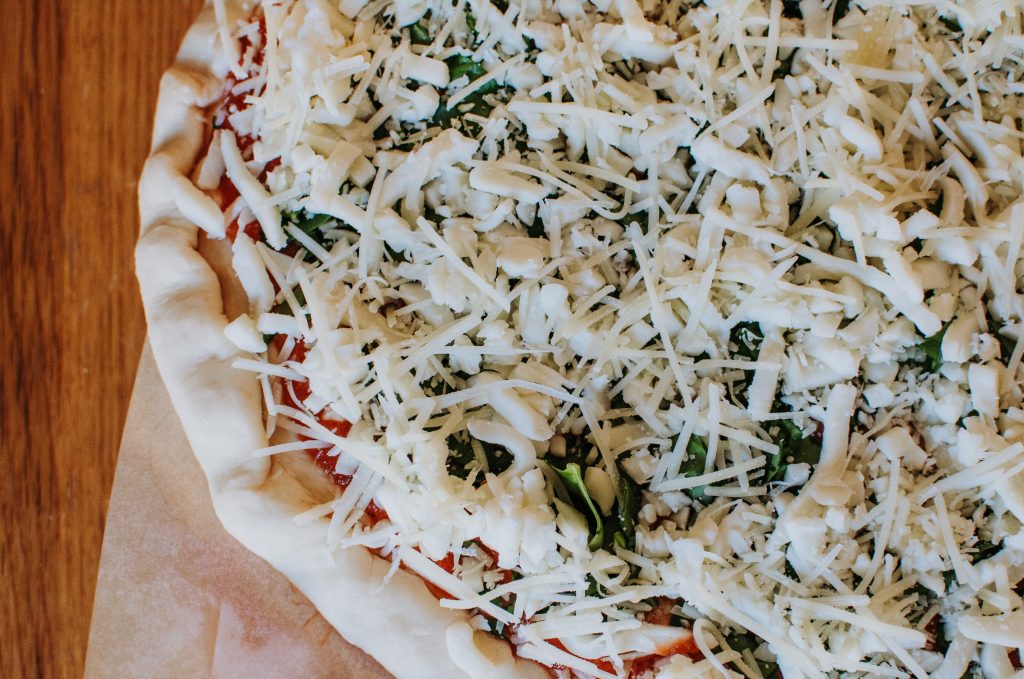
- We used to just load on the cheese because we figured that more cheese would always equal more deliciousness. While most of the time in cooking that might be true, in this case, you actually want to be a bit more prudent with your cheese than you might think, so the other toppings and the sauce get a chance to shine, too.
- If you’re making a pizza that involves chicken (as one of the below recipes calls for), it’s best to slightly undercook it in the initial cooking process so that it doesn’t dry out when it’s then baked in the oven. I haven’t done the exact internal temperature measurements, but as chicken is supposed to be cooked until at least 165 before eating, I would say to cook it to around 140-145 in the initial cooking stage and then count on it to get to the 165 during the last baking stage.
- If you like a stronger olive oil flavor in your crust, you can brush the very edges of your crust all around the diameter with extra olive oil, which gives it a higher punch of flavor AND makes it more crispy.
Recipes
Note: the dough, red sauce, and mushroom/spinach pizza recipes were all adapted (read: slightly or moderately changed) from the America’s Test Kitchen Complete Vegetarian Cookbook (which I highly recommend, btw). The white sauce recipe has just some slight variations from the white sauce recipe found on the Genius Kitchen website, with the toppings inspired by our friends Rob and Katie.
Pizza Dough
4-1/4 cups (23-1/3 oz) flour
1 tablespoon active dry yeast
1-1/2 teaspoons salt
2 tablespoons olive oil
1-1/2 cups warm water
- Combine water and yeast in a liquid measuring cup or other small bowl and let sit for 10 minutes until bubbly/foamy.
- Meanwhile, pulse flour and salt together, then add the olive oil gradually while the mixer continues to run.
- Slowly add the yeast mixture to the flour mixture, letting the mixer run continuously the whole time you’re adding it.
- Pull out the dough and knead by hand for about a minute, then form the dough into a ball. Place in a greased bowl (or, if you’re lazy like me, back in the mixer bowl), and cover with a cloth or plastic wrap. Let rise in a warm place while you prep all the other ingredients (ideally at least an hour, but I’ve done it less lots of times.)
- When dough is risen, punch down and separate into two equal parts. Recipe makes enough for two round pizzas (ours are about 13″ in diameter).
Classic Pizza Sauce
- 1 (14 oz) can crushed tomatoes
- 1 tablespoon olive oil
- 2 garlic cloves
- 1 teaspoon red wine vinegar
- 1 teaspoon dried oregano
- 1/2 teaspoon salt
- 1/4 teaspoon pepper
Thoroughly pulse all the ingredients together in a food processor until mixture is smooth. Makes enough for two large round pizzas (up to about 14″ in diameter).

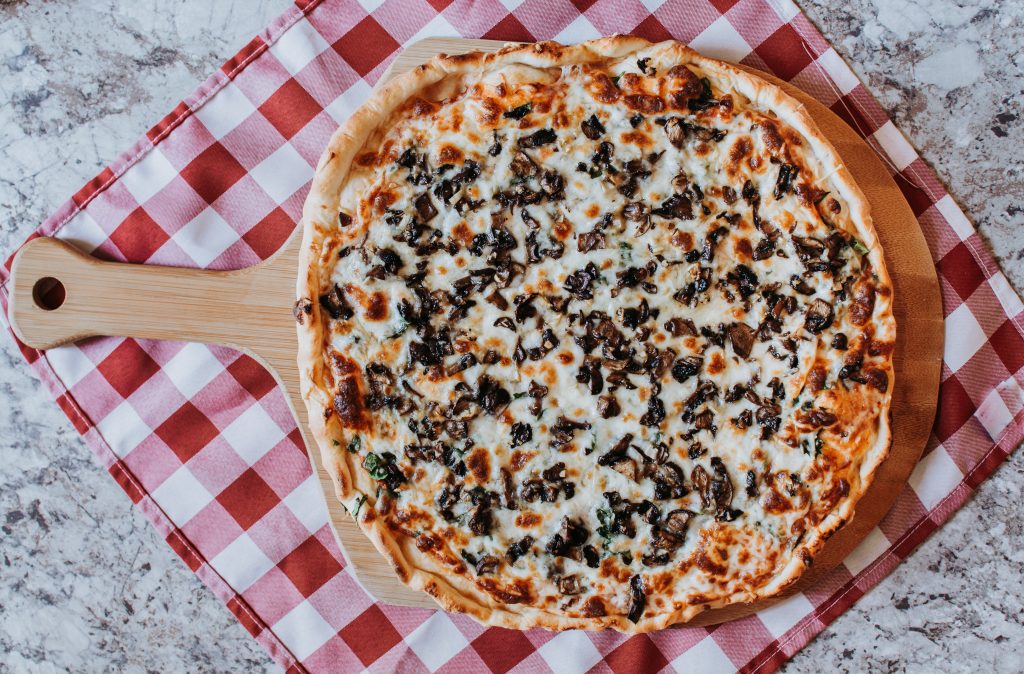
Pizza #1: Mushroom + Spinach
- One recipe Pizza Dough
- One recipe Classic Pizza Sauce
- 2 tsp olive oil
- 8 oz cremini mushrooms, chopped small
- 3 minced garlic cloves
- 20 oz spinach, chopped (we use fresh, but you could also use frozen)
- 2-1/2 cups mozzarella cheese
- 1/2 cup Parmesan cheese
- Salt and pepper
- Place pizza stone in oven and preheat to 500 degrees (ideally for at least an hour).
- Heat up olive oil in a medium skillet until shimmering. Add the chopped mushrooms and spread evenly into the skillet. Cover and cook until mushrooms are wilted and wet, around 5 minutes. Uncover the skillet and allow the mushrooms to keep cooking (stirring occasionally) until the mushrooms are dry and browned, about 5-10 minutes longer. Add garlic cloves and cook until fragrant (stirring constantly), about 30 seconds. Season with salt and pepper to taste and remove from heat.
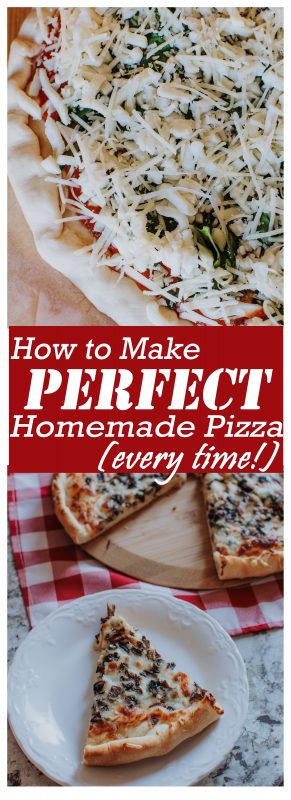
- Form dough into two circular pizzas (each on its own parchment sheet), up to 14″ in diameter (ours are about 13″). After rolling the pizzas out, fold the very edges of the dough towards the center (about 1/2″) and use your thumb to punch down an indent. Continue to do so around the perimeter of the pizza until you have a crimped crust (see pic of dough + sauce above).
- Spread half of the classic sauce mixture onto each pizza crust (you might have a little left over). Sprinkle each pizza with 10 oz. chopped spinach, 1-1/4 cups mozzarella, 1/4 cup Parmesan, and 1/2 of the mushroom mixture (in that order).
- Using the pizza paddle (if you have one), carefully slide the entire pizza onto the heated stone. (Note: we slide the parchment paper into the oven too so the pizza’s easy to get back out again, but most of the parchment paper instructions I’ve been reading lately say that they’re only approved to use up to 450 degrees, so…perhaps try at your own risk :). We’ve never had a problem though, and we’ve been doing this for several weeks!)
- Bake at 500 degrees for 8 – 13 minutes until the edges are browned and the cheese is melted and golden in spots. (In our oven, 12 is about perfect every time, but our oven tends to run cooler than many.)
Yield: 2 fabulously delicious pizzas
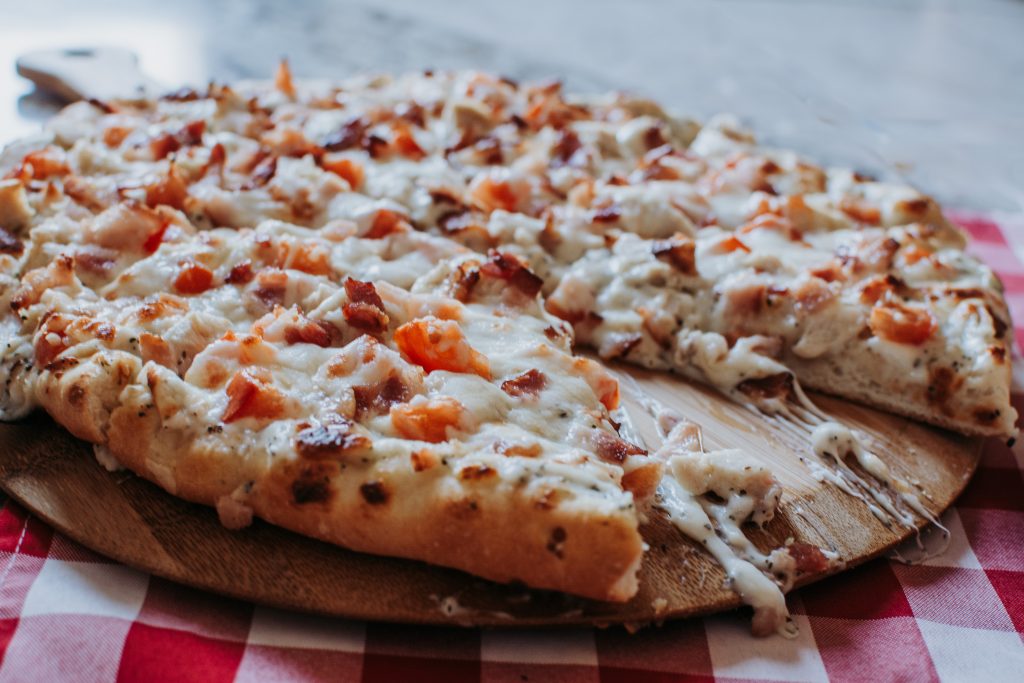
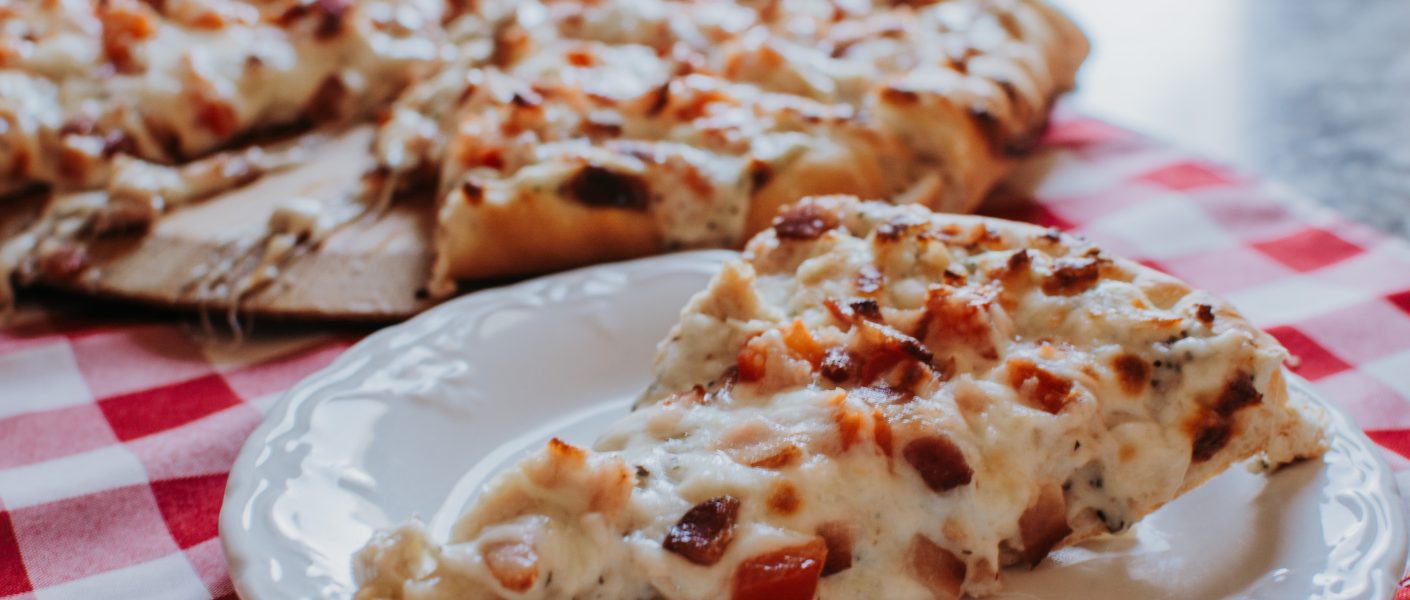
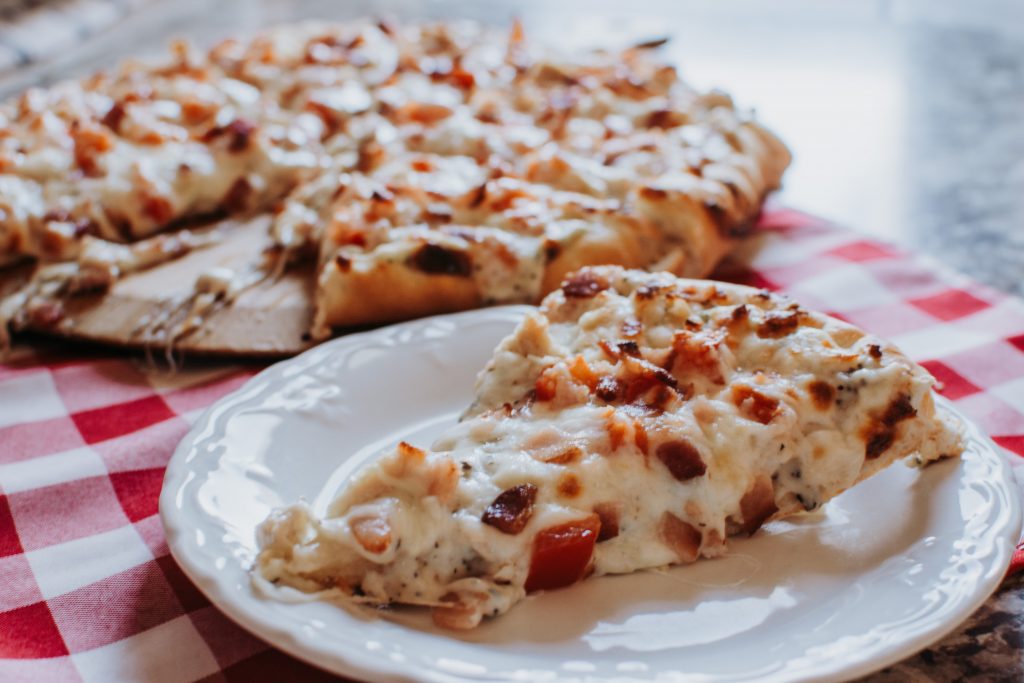
Pizza #2: Chicken, Bacon + Tomato Pizza
One recipe Pizza Dough
White Sauce
- 2 tablespoons butter
- 3 tablespoons flour
- 1 cup milk
- 1/4 tsp salt
- 1/8 tsp pepper
- 1 garlic clove, minced
- 1/2 tablespoon dried basil
- 1/2 cup Parmesan cheese
Pizza Toppings
- 2-1/2 cups mozzarella cheese
- 2 vine-ripened tomatoes, diced
- 4 slices cooked bacon, chopped small
- 2 small chicken breasts (or one large), cooked and diced
- Form the dough into two circular pizzas, about 13-14″ in diameter. Crimp the perimeter of each pizza to form a clear crust (see above notes).
- If you need to cook the chicken and bacon still, start them now (I usually just boil the chicken or use the Instant Pot and bake the bacon in the oven). Meanwhile, melt the butter in a small saucepan. Add the garlic and cook until fragrant (about 30 seconds), stirring constantly. Whisk in the flour until no dry streaks remain. SLOWLY add the milk, whisking thoroughly with each new addition, and keep the heat at medium to medium-high. Add the basil, salt, and pepper, and continue stirring occasionally until mixture comes to a slow boil and thickens noticeably. Whisk in the Parmesan cheese until melted, then take off the heat.
- Spread half the white sauce mixture onto each pizza. Top each with half the cheese, bacon, tomatoes, and chicken.
- Bake at 500 degrees for 8-13 minutes until crust is browned and cheese is melted and golden. (In our oven, 12 minutes is about perfect.)
Yield: 2 creamily delicious 13-14″ round pizzas
Are you all ready to make Fridays your permanent Pizza Nights now?! Prepare for your life to be changed!
What are your best secrets for making perfect homemade pizza?
P. S. Have you subscribed to my email list yet? A few times a month, I sent out exclusive content only to email subscribers, and my next email goes out in just a few days, which will include a bonus book list, tips on frugality and being smart with your money, and more! Click here to make sure you get that before it’s too late!