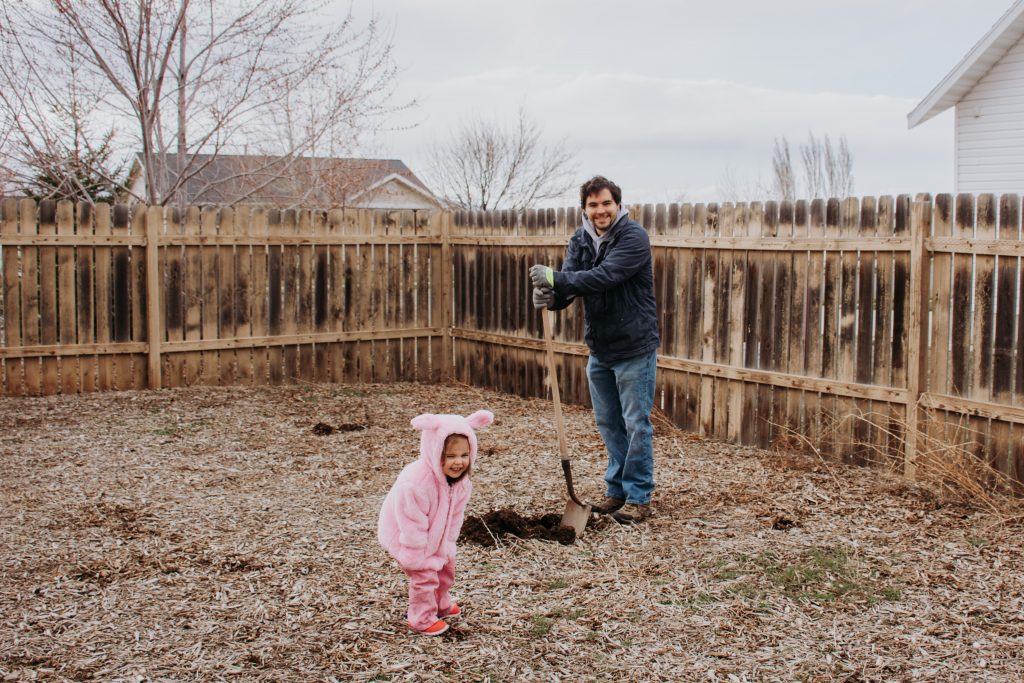
This last weekend, my husband and I did more yardwork in one 48-hour period than we’ve probably ever done before in our adult lives. Between building raised garden beds, picking up loads of compost (and spreading it out, one wheelbarrow load at a time), attempting to transplant seeds, moving rocks and rearranging flower borders, and doing some watering/fertilizing/weeding, we were beyond exhausted by Saturday night.
And 100% proud of ourselves.
One of the things I was most excited about when we moved into our first home last June was the prospect of finally having our own yard, something I’d dreamed about for years. A part of me was worried that the novelty and excitement of it would wear off quickly and that I would no longer be motivated to do anything with it after awhile (and just view it as another chore), but happily, that hasn’t been the case yet (maybe give it 5 or 10 years).
For now, we’re just excited that the days are finally warming up and that we have lots of enthusiasm to tackle these projects now.
However, with the costs of home ownership being much higher than the costs of us renting and with us being basically a single-income family, we did have to carefully budget for and plan out how we were going to have the money to pay for all the outside projects we had in mind for this year.
In case you’re curious as to what we’ve been up to (and the costs associated with each), I’ve included all the details below.
Related Post: 10 Lazy Gardening Hacks Learned From Our First Year of Home Ownership
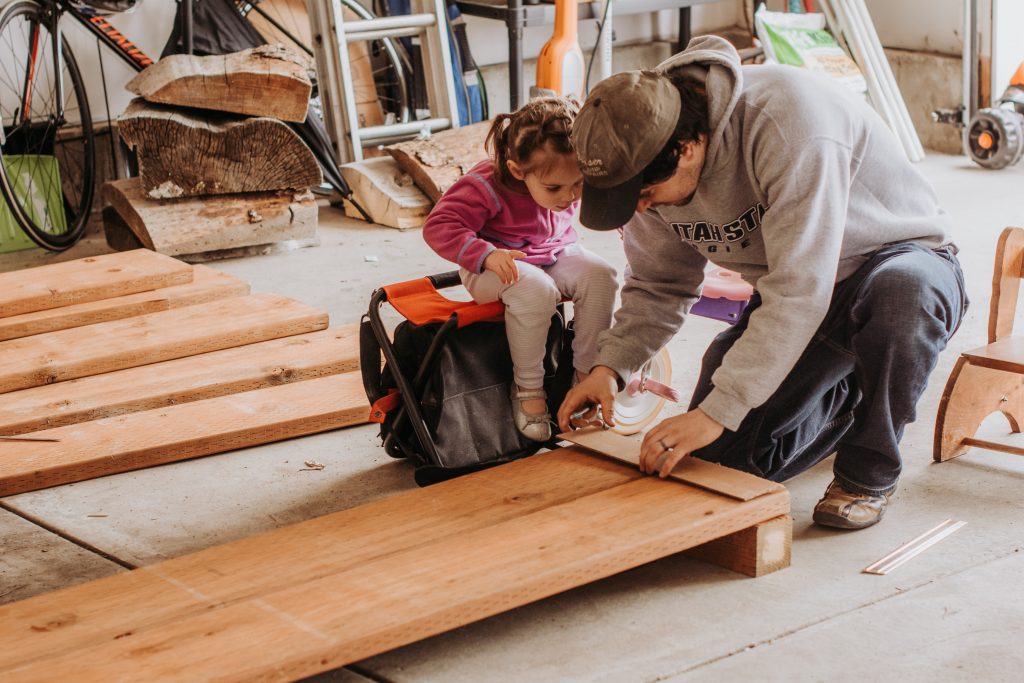
1) Raised Garden Beds
I hadn’t much considered the idea of raised garden beds before moving into a house, but once we purchased our current home, it quickly rose to the top of my outdoor priority list for a couple of reasons:
- The previous owners had xeriscaped the entire yard so that it would need minimal upkeep and not as much water. While this is great on a lot of levels, it meant that we inherited almost no perennials (other than ones that were larger bushes, such as lilacs or forsythia) or flower beds, and it also meant that many of the existing beds and many large sections of the yard were covered in bark (to discourage weed growth and to cut down on the need to water those areas) or rocks (which seem to literally grow in this area…they’re everywhere!). Reconfiguring enough garden space for the vegetable/herb gardens I’d envisioned would take a TON of work and a total overhaul of the overall landscape design, which we just didn’t want to do right now.
- As I said above, the dirt here seems to breed rocks, and in many of the places where we’ve dug down, the soil hasn’t been very good quality, either. So, if we wanted to try and do our veggie garden right in the ground, we would have to wage a war with the rocks first and then figure out a way to improve the soil so it would be both more manageable and hospitable.
- There is a massive part of our side yard that is entirely covered in bark and, as of now, only houses some fruit trees and larger bushes/pines. The rest of it, however, is just a blank expanse of…nothing (well, until the weeds start coming through in the warmer months). The layout was literally perfect to put in some garden beds, so it just made sense to go that route for space reasons.
- Lastly, raised garden beds would be easier to work on (especially when it came to weeding) and easier to control certain factors (such as the soil or keeping certain plants contained to just one area).
Once we’d determined to actually build some raised beds, we went to work doing some research–my husband pinned raised garden bed designs like crazy on his Pinterest board, and I started picking the brains of my family members and friends who had done raised garden beds to see what tips they had.
A couple takeaway points from their advice:
- Buying soil in bags from a local garden/home store can get EXTREMELY expensive and is often what makes up the bulk of the cost of doing raised garden beds. Looking into cheaper options can literally save you hundreds of dollars (more on this later).
- For convenience, visual interest, AND depth of your plants’ root systems, it is usually better to go with higher raised beds rather than with lower. However, the higher your bed, the higher your costs in both materials AND soil to fill it with. I talked to people who had gone as low as six inches high (and said they definitely would choose to go higher next time), to people who thought that a foot was a great height for both cost efficiency AND still deep enough for the root systems, to people who told me not to go any lower than two feet. From this, we decided to go between 12″ and 24″, depending on the kind/cut of wood we ended up going with.
- Once your raised garden beds are filled with soil, it’s pretty annoying to have to move them, so pick your spot with care—chances are, that’s where they’ll be staying for years and years (so thoroughly check sun/wind/precipitation conditions for that spot).
- Rectangular beds are usually easier to take care of than square beds, simply because it can sometimes get hard to weed/reach into the very middle of a large square bed (whereas in a rectangular bed, you usually have less distance you need to lean in).
- Put plants that spread a lot (aka, squash, zucchini, watermelon, pumpkin) at the corners/ends of the beds so that the vines can drape over the side and you aren’t having one plant take over an entire bed.
With all that in mind, we chose a basic design for our garden beds and started doing some research on the materials and cost. Within 24 hours, one thing immediately became apparent:
While we’d originally planned to build four raised garden beds, it simply wasn’t going to be in the budget this year. We still went out and measured our space and chose dimensions so that four beds will eventually fit in the space, but for now, we decided to stick with two.
Wood for the Beds
The first material we needed to obtain was obviously the wood to actually build the bed frames. We priced out 3 options:
1) A local wholesale wood distributor who mostly just had untreated wood
2) Home Depot
3) A coworker of Matt’s, who just moved into a home with a huge barn that they are tearing down soon and not needing all the wood from
The third option obviously would have been our first choice (as it would have been free), but the wood available there wasn’t usually thick enough for what we were wanting, and we weren’t sure how some of it would hold up to the elements (since the boards we were interested in came from the interior). We did, however, get some thick 4×4 boards for the corners/middle from here, which saved us about $20 or something like that.
After talking it out with various people, the decision came down to whether we wanted to save some money by going with the untreated wood (which would likely need replacing in a few years) or splurge a bit and get the treated wood (which should last a lot longer). As I usually am all for spending more money in the first place to avoid having to replace cheaper things in the long run, we decided to bite the bullet and go for the treated wood (which was cheapest/most available) at Home Depot.
A place we could have for sure saved more money than we did was actually in buying the screws to fit the beds together. We knew we wanted screws that wouldn’t rust and that would hold up to the outside elements really well, so we bought a big box of stainless steel screws that we *thought* would cover the whole project. Come to find out, we really should have determined how many screws we’d need total before we bought any, especially since the screws we bought for the second bed ended up being quite a bit cheaper and just as durable, simply because we went for a slightly smaller size.
All in all, our cost breakdown looked like this (including sales tax):
$200.45 for the treated wood for the siding (12 boards of 2×10 – 8ft)
+ $24.00 for the treated wood for the corners/middle (2 boards of 4×4 – 8ft) – would have cost us almost double, but we got one for free from Matt’s coworker
+ $49.29 for exterior screws (we have quite a lot leftover, but we could have saved a LOT on this if we’d planned better)
______________________
$273.74 Total Cost ($136.87 per bed)
Had we decided to build our beds shorter (made them one plank high rather than two), we could have shaved $100 off the total cost, but we worried that 10″ high might be a little on the low side, so we decided to double up. I think in the long run, we’ll be really glad we did! (If for no other reason than the fact that we won’t have to stoop down as low!)
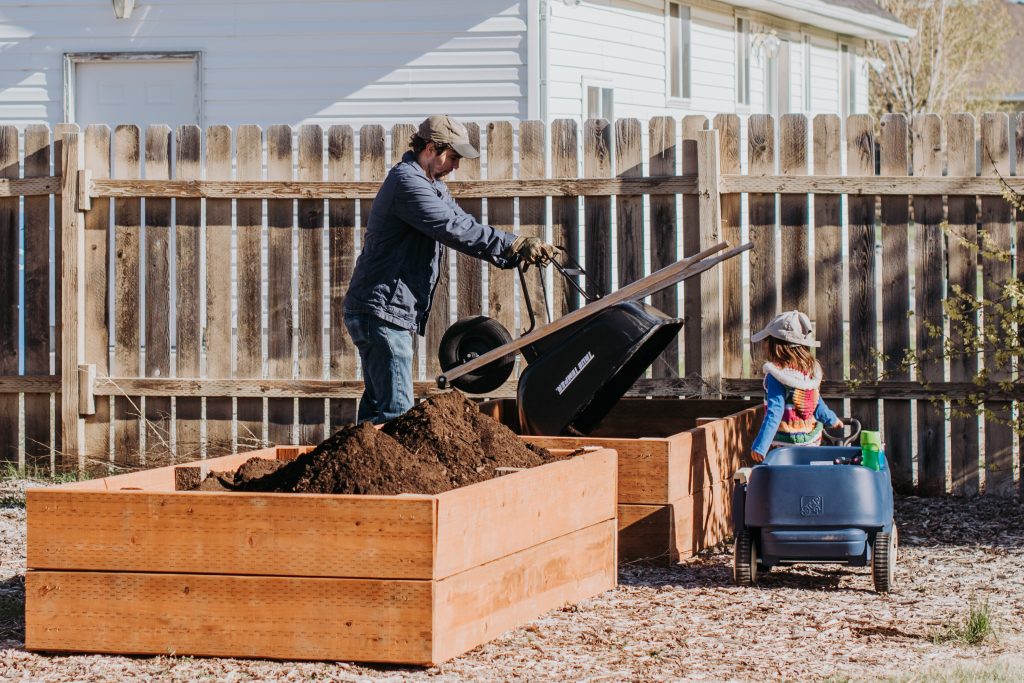
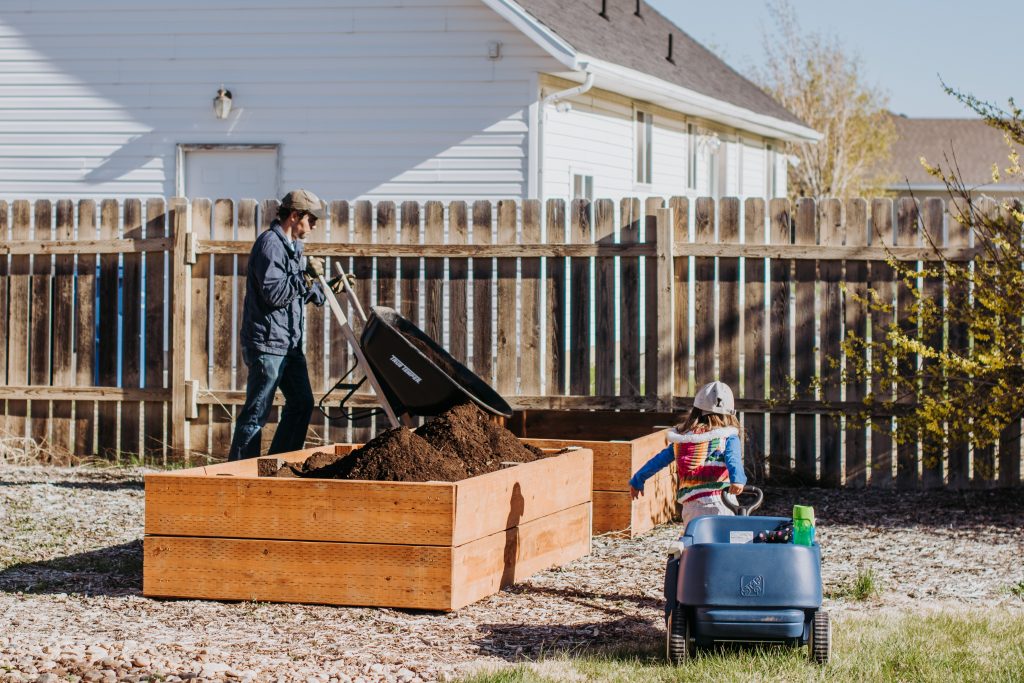
Compost + Rocks
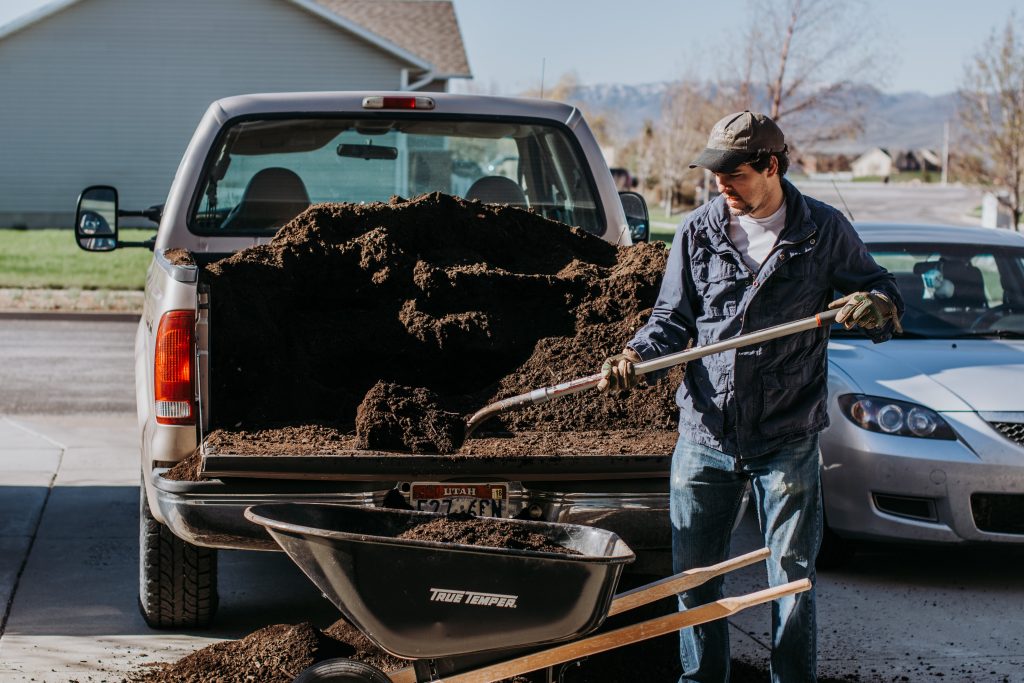
From what I could tell, getting the soil for the beds could get REALLY expensive REALLY fast (because it’s incredible, really, how much dirt you need to buy to fill those babies!), so we wanted to be as frugal as we could about it.
My husband’s boss has a pretty extensive knowledge of gardening and agriculture (he was the one who actually started and headed up the whole community garden thing we did a few years ago), and he told us that buying bags of dirt from a garden supply store would be a waste of money (not because it wouldn’t be effective, but just because we didn’t need to spend so much). He suggested looking around for places who sold compost by the truckload and just using that to fill our beds.
So, in doing some research, I discovered that our local landfill recycles all the green waste into compost and sells it by the truckload for only $20 per load, so it seemed like a no-brainer (plus I’d had some local readers tell me they’d had success with using it in the past, which only solidified that it would probably be a good idea).
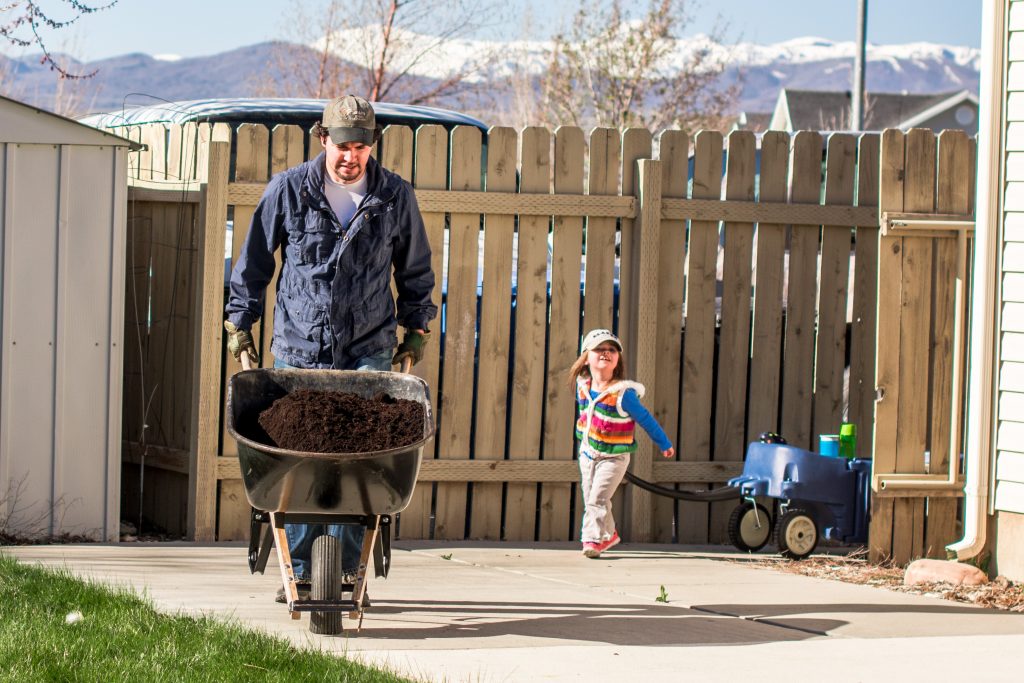
We ended up getting 2.5 truckloads of compost, two of which went entirely to the raised garden beds, and the other half-load which went to some other areas of our garden.
Here’s where I need some input, though:
Matt’s boss said that we would be fine using exclusively compost (with no other dirt mixed in) for our raised garden beds, no problem. In fact, he just suggests adding a new layer of compost on top of your garden beds each year for maximum growth potential.
However, the guy at the landfill said that if we didn’t mix the compost with other soil, nothing would grow (something a couple of our friends backed him up on last night when they came to look at them).
Here’s my question:
Do we need to put some “regular” soil into those beds then? If so, how much?
(Or, if anyone has had luck just planting stuff directly into compost and having good results, I’d love to know that, too!)
(I’m not as worried about the compost we just dumped onto the regular garden areas as much as our raised beds, just because I figure eventually the compost will mix into the soil that was already there, and the plants will be fine.)
Update: We took the risk of just planting our vegetables and seedlings in straight compost, and they THRIVED the first year we tried it. The second year, we tried the same thing, but the plants definitely did not do as well. We consulted a friend with a PhD in Horticulture, and he said that as long as a compost is 100% green matter, your plants should thrive. If there is ANYTHING else mixed in (as there often will be at the local landfill), then the compost becomes chemically too “hot,” and your plants will suffer. If you still want to save money by getting compost from a landfill, buy it several weeks before planting anything in it and regularly douse it with water.
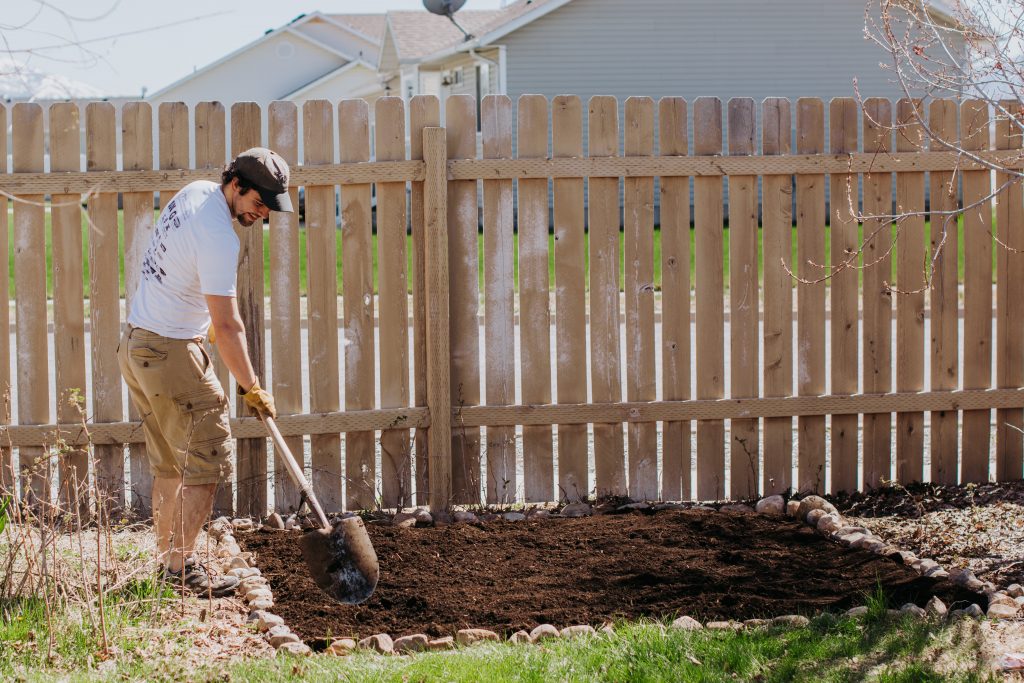
Our other (bigger) project on Saturday included raking out the layer of bark covering a few of our beds (like the ugly bed-of-nothing right against the back of our back patio), attempting to weed and clear out a large section of “The Patch” (which had been completely taken over by raspberry bushes, pictured above), and skimming out the rocks that had been put down to discourage the weeds in our two front garden beds, which I eventually want to expand out further (though we won’t do so this year). We then formed a newly-outlined vegetable garden to the side of The Patch that WILL be planted straight into the ground, and covered all the newly-weeded and newly-scraped out beds with compost. (We also took the rocks that we’d taken out of the front beds and used them to create the border around our new vegetable garden above.)
As long as the compost doesn’t make it so that nothing grows, I think I’ll be going with this method of “just cover everything with compost” for the rest of the time since IT’S BASICALLY THE LAZIEST WAY TO GET A GREAT-LOOKING GARDEN BED EVER.
Total Cost of Compost: $50 (+$10 in gas money for borrowing a friend’s truck)
Obviously, our costs in this area will go up if we end up having to buy some bagged soil after all.
Trees + Plants
Now that our beds are built and/or composted, we are basically ready to plant as soon as the weather gets just a *bit* more stable.
What we HAVE already put in are our two new fruit trees (we planted a semi-dwarf apricot and a semi-dwarf peach in our backyard by the two apple trees that were already in existence). One thing I didn’t know before this month was that many local nurseries offer super discounted prices on fruit trees before they actually “plant” them into individual pots (usually as soon as the weather starts getting warmer).
If you’re able to get your fruit trees in the ground within about 12 hours of buying them, it’s definitely worth it to pay about half as much for one of these “bare root” trees. We were able to get both of our trees for around $25-30/apiece, rather than the $40-50/apiece they would have cost us otherwise.
Along with our trees, we bought some dormant spray (which you spray on the trees before they bud to kill any pests or bug nests/eggs that have accumulated on them) to hopefully save us from having to do too much with pesticides later in the season, and we also bought some root starter fertilizer, which is supposed to help whenever you need to transplant something.
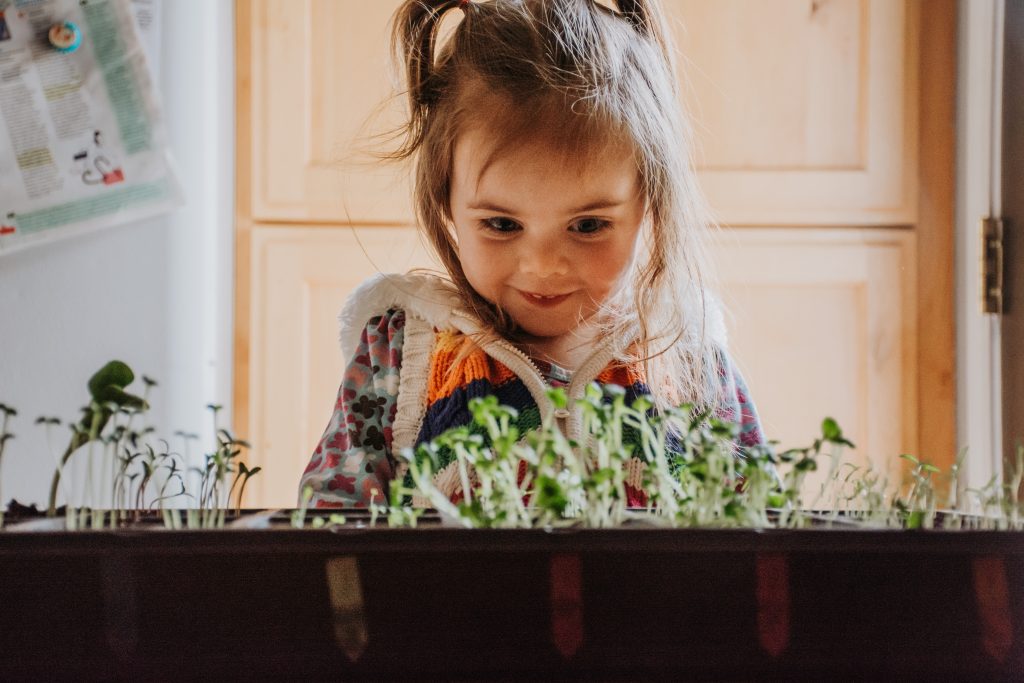
In the last month, I also bought a little seed-starter tray and some potting soil to try and see if we could cut some of our plant costs down by starting most things from seed. We are attempting to grow and then transplant a few veggies/melons from seed (radishes, carrots, pumpkins, watermelons, butternut squash, zucchini) and a few flowering annuals/perennials from seed (daisies, zinnias, marigolds, alyssum, cosmos, pansies).
Right now, it’s looking like we might have to start over with the radishes and just sow them directly into the garden beds outside (since they seem to be dying in our seed tray), and I don’t know how many of the others will transplant successfully, but at least we’ve made a solid attempt!
I also plan to budget $30 to buy some daylilies and peonies from Sam’s Club (which are sold for $15/package and include multiple bulbs), buy some herb seeds that will be put directly into the garden beds in a few weeks, and pay about $30 more for several tomato plants, green peppers, and possibly a few bean or pea plants, too.
Total (Expected) Cost of Trees + Plants = About $160
All in all, that puts us at about $500 in for all our garden projects this year, which is a bit pricier upfront than we’d wanted, but we’re hoping that the long-term results will make it definitely worth it in the end. (We’re also considering paying an additional $300 to a local company to do a bundle package for us that would include monthly lawn treatments, weed treatments for our bark areas, and wasp treatments for the season, but we don’t know for sure—we’re still trying to price out if it’s better to try and tackle some of those things ourselves.)